VERSION CONTROL SYSTEM (VCS) :
A Version Control System (VCS) is a tool that tracks changes made to files or source code over time. VCS allows you to :
- Save versions(snapshots of your projects) of your project or code at any time.
- Compare changes between different versions.
- Undo mistakes by restoring older versions.
- Collaborate with other developers without overwriting each others work.
DISTRIBUTED VERSION CONTROL SYSTEM (DVCS) :
A Distributed Version Control System (DVCS) is a type of version control system where every developer in the team has a complete local copy of the entire project repository including its history
AFTER THIS YOU MUST BE WONDERING THAT WHAT IS GIT AND GITHUB:
GIT :
Git is a version control system.It help us to track changes in code and also to track changes made by various developers(e.g commit helps us to do this) , history of code and also in collaboration(e.g working with a team on a project).
- It is popular,free and open source.
- It is fast and scalable(it can efficiently handle large as well as small projects without any performance issues).
GITHUB :
A cloud based platform (A cloud-based platform is a service or software that runs on the internet instead of your local computer. You access it through a web browser or an app, and your data and applications are stored on remote servers(computers that are located somewhere else instead of your local computer) managed by a company.) for hosting git repositories .
IN SIMPLE WORDS :
A website that allows developers to store,share and manage their code using git and collaborate on code over the internet.It is widely used for collaboration and open source projects.
BASIC TERMINOLOGIES:
Repository (Repo) :
A repo is a project folder that Git tracks. It stores your files and their history.
Commit :
A commit is like saving your work with a message explaining what you changed.
Staging Area :
Before committing, files go to a staging area ,a temporary space.
Clone :
Copying a GitHub repo to your computer.
Push :
Sending your files from your computer → GitHub.
Pull :
Getting the latest files from GitHub → your computer.
Branch :
A separate version of your project. Main branch = main or master. Branches help you test changes without breaking the main project.
README file :
A file that explains your project. GitHub shows it on your repo home page.
INSTALLATION OF GIT IN UBUNTU :
STEP 1 :
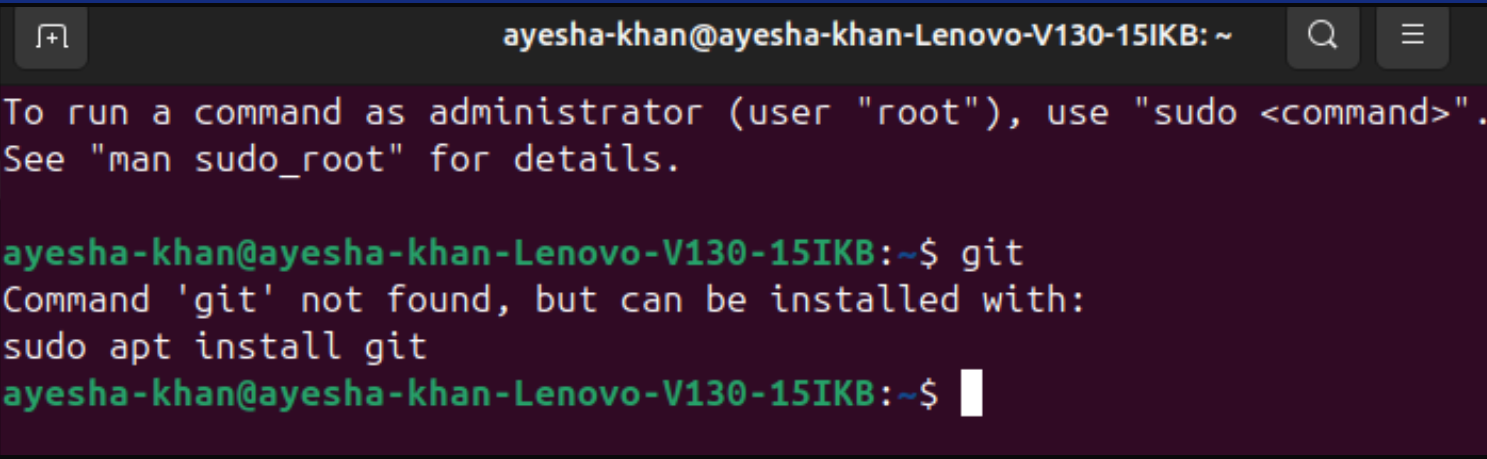
Open your terminal in Ubuntu and enter command git to see if GIT is already installed or not.
STEP 2 :
Enter command sudo apt update to check for new versions of software(apps,programs) on your PC or to tell your Linux computer to look for the new updates for the apps and programs it can install.
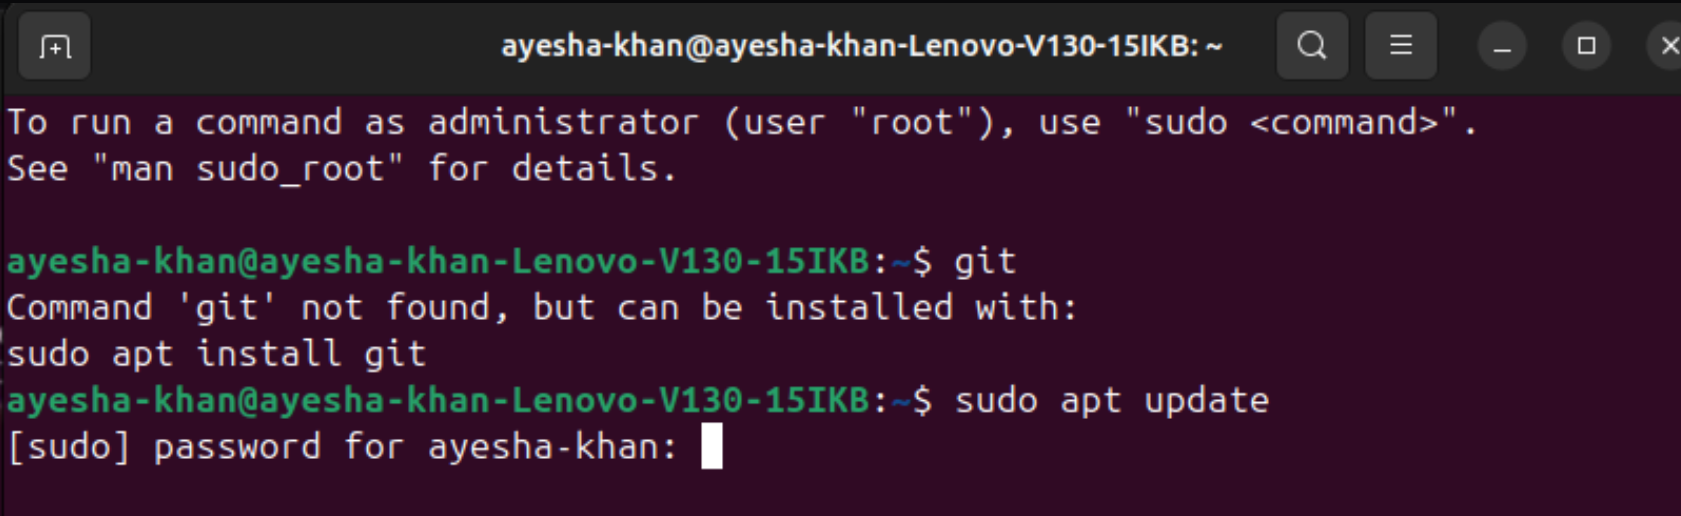
After this , enter the password of your ubuntu and after this clear your terminal by entering this command clear.
STEP 3 :
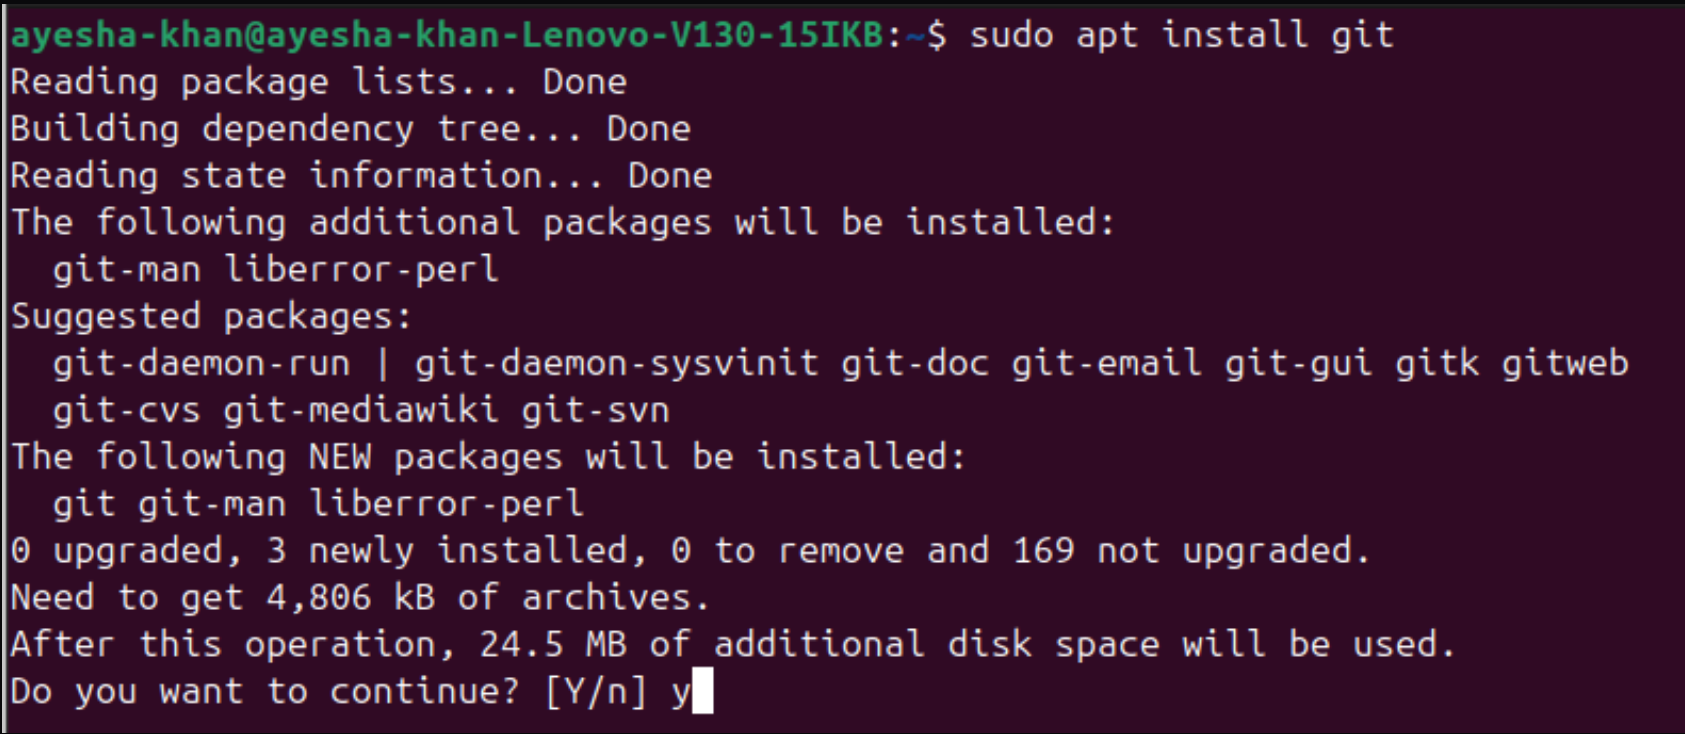
Now enter command sudo apt install git and after that enter y for the continuation of installing GIT.
STEP 4 :
Now again clear your terminal by clear command and once GIT is completely installed enter command git –version to check the version of your installed git.

Now the git installation is completely done.
STEP 5 :
CONFIGURING GIT :
WHAT IS CONFIGURATION :
Generally , it refers to the process of defining settings and parameters that controls how a system software or tools should behave.
In case of GIT,Configuring Git means creating settings (Key_Value pairs) that tells Git who you are and how it should work.
- Key(Name or Label) —> user.name,user.email.
- Value(Information stored for that label or name) —> your name,your email.
- Together they create a Key-Value pair.
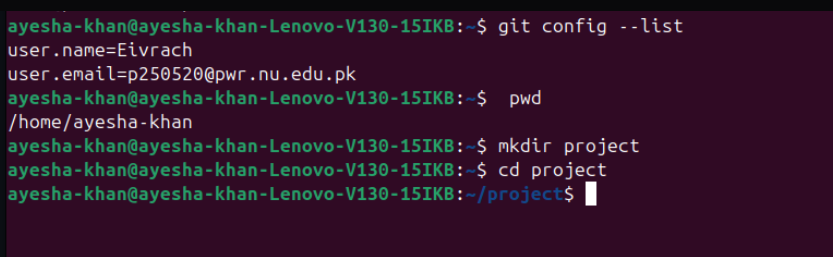
- Enter these commands.

The Git is successfully installed and configured.
STEP 6 :
INTEGRATING GIT WITH GITHUB :
FOLLOW THE GIVEN STEPS:
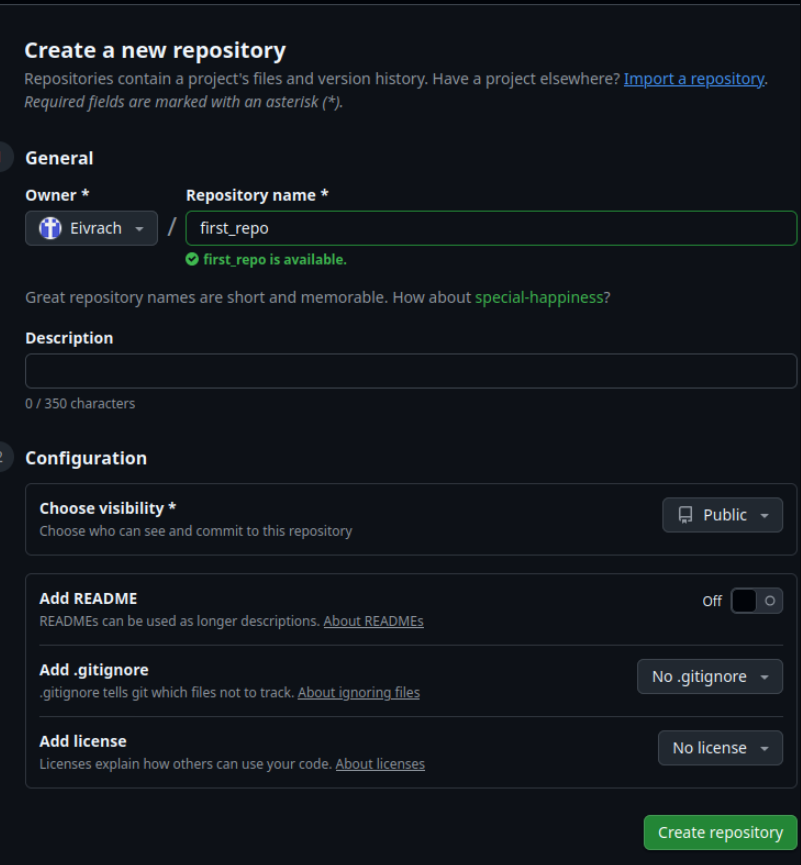
- Sign in to your GITHUB account.
- Create new repository by clicking on + icon.
- Now add name and description.
- Turn on the READme file.
- Now click on create it. FINALLY , You’ll see that a new repository is created.
STEP 7 :
Now go back to terminal and enter command pwd.
STEP 8 :
Enter command mkdir your folder name.It’ll create a folder and enter command cd your folder name.
e.g Here project is my folder,likewise you can add yours.
STEP 9 : CLONING OF REPOSITORY
Follow the given steps :
- Click on the repository.
- After this, click on code and then click on HTTPS and copy that url.
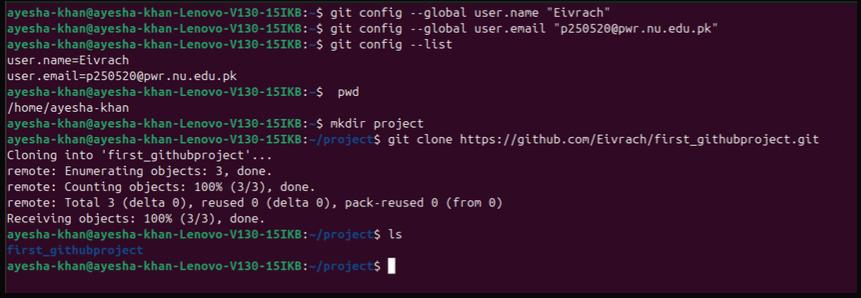
- Now enter command git clone and here paste (ctrl+shift+v) your url.
- Press enter which is going to clone your repository.
- Enter command ls.
- You’ll see your cloned repository there.
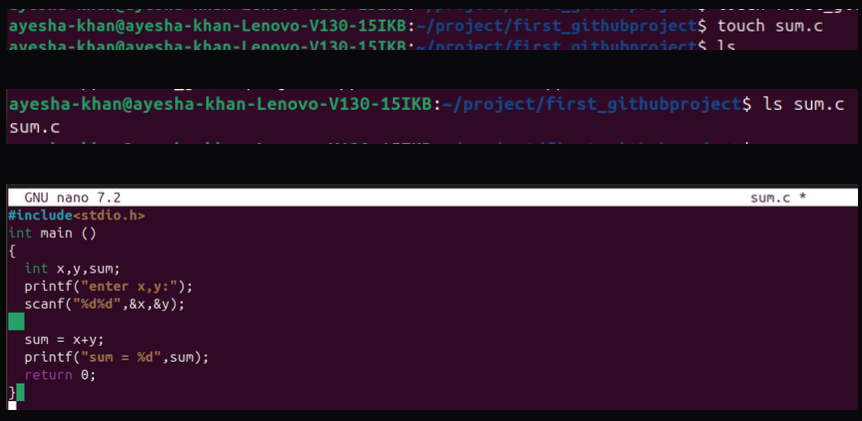
- Enter command touch file name for creating a file and enter command ls file name.
- Now enter ls file name.
- Enter command nano file name.
- Now enter whatever you want in that repository and then save it through ctrl+o.
- File name to write : your file name and exit by ctrl+x.
STEP 10 :
PUSHING FILE FROM GIT TO REPOSITORY IN GITHUB:
Enter command git status. It’ll show untracked files(which means these files are not tracked by git till now).
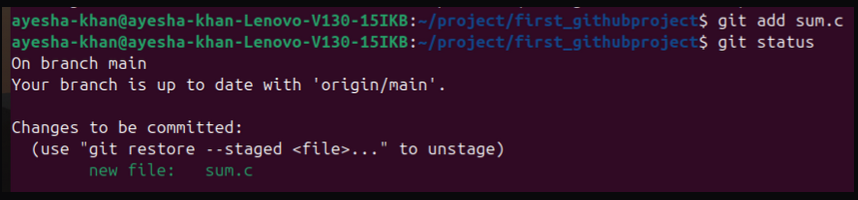
To add this to your GIT , enter command git add file name To commit , enter command git commit -m any name

###Why we have used this commit ? So that we should remember what changes have we made in our file.
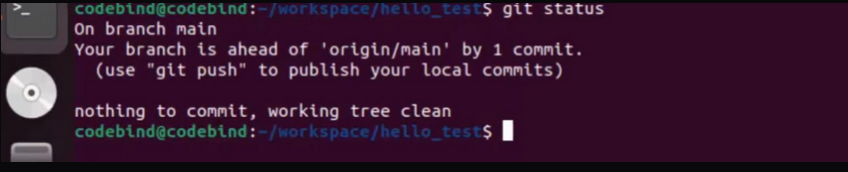
This means that you are now good to go with pushing your your local commits to remote repository in GitHub.
After this enter command git push main origin.
STEP 11 :
After that enter your username and password but it doesnot accept your ubuntu password.Instead, GitHub requires a Personal Access Token (PAT). This token acts like your “GitHub password for terminal”.
Follow these steps :
- Open GitHub.
- Click your profile picture (top-right).
- Go to Settings.
- Scroll to the bottom → Developer settings.
- Click Personal access tokens.
- Select Tokens (classic).
- Click Generate new token
- Enter note (any name).
- Select time.
- Select all the boxes.
- Scroll down → click Generate token.
- Copy the token.
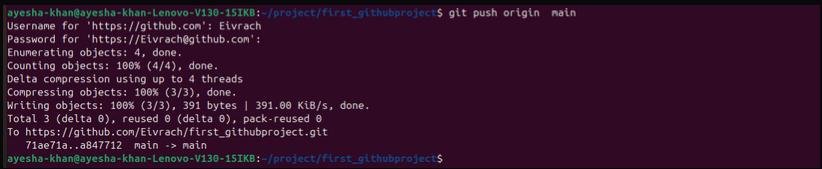
NOW When terminal asks for password → paste this token. The password will not appear and you have to press enter. After this appears, this means that your file has now successfully pushed into remote repository.
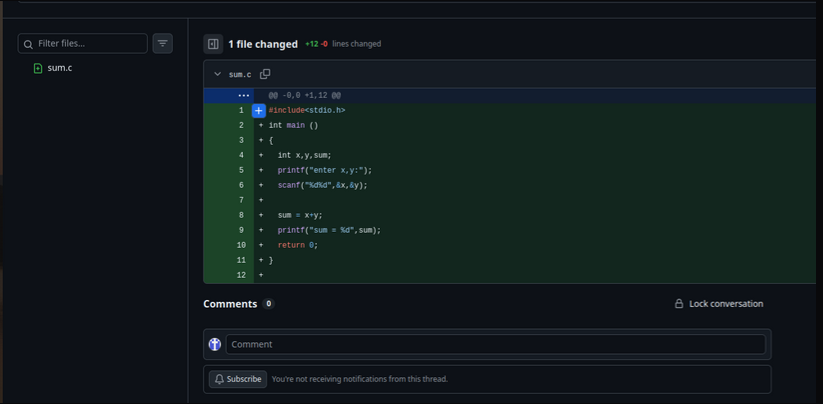
As i click on c programming code , my file appears.

GOOD LUCK